|
|
|
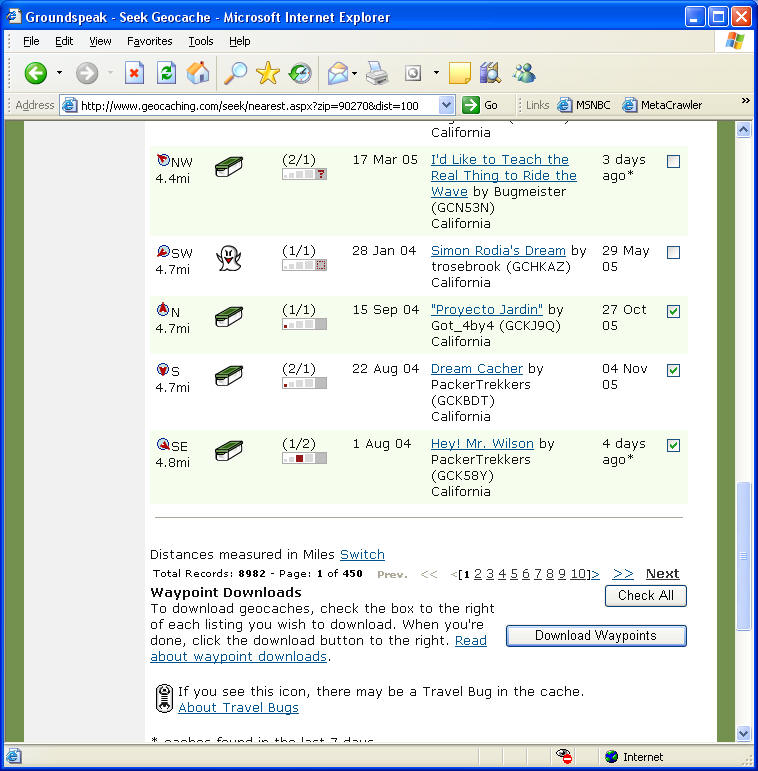
BackgroundWhen we started Geocaching and Benchmark Hunting we would print out the description of the location, and go to Google Maps and print out a map of the area. It worked OK, but we found that we were going through a lot of paper (especially on caches where the logs were particularly long). Also we had to organize and transport a lot of paper when we were out on the hunt. We've owned a Palm for a long time, and decided that we needed to try to use the Palm to go paperless. This page describes how we've done it. Our EquipmentWe have a PC using Internet Explorer, a Palm m515, and an iFinder H2O. The tools and procedures described here should work with any Palm and iFinder (except the Go and Go2). If you don't have an iFinder but do have a Palm then the Web Page section will still be applicable. Saving Web PagesMost of the paper we used was from printing the cache descriptions and logs from geocaching.com. We also printed a Google Map page for each cache. To go paperless we found PC software that transfers Web page contents and graphics to your PC (Sunrise Desktop), and Palm software that displays the Web pages and graphics on your Palm (Plucker). Saving CoordinatesTo copy coordinates from geocaching.com to you GPSr you first select the caches you would like to save and push "Download Waypoints".
"Download Waypoints" will create a .loc file which you can conveniently save to your desktop. Next, you need to convert the .loc file to a .txt file that can be imported into GDM6. You can convert it manually (latitude, longitude, name), or use LocToTxt. Once converted, you need to start GDM6 and select File/Import GPS Data/Import Waypoint List and select your .txt file and import the coordinates into GDM6. The coordinate names can be lengthened and the Icons can be updated using GDM6. Once complete you use GDM6 to save the .usr file (GPS Data file) to your hard disk and to your MMC card. To get the coordinates into your GPSr you insert your MMC card with the .usr file, select "System Setup", then "Transfer My Data...", then "load" the .usr file.
If you have any questions or comments about this page click here to send email.Last Modified: September 11, 2010 02:12:52 PM
|